Choosing hiking boots from China requires more than comparing prices, materials, or online ratings. Heel security can decide whether a comfortable trail becomes a painful descent. When the rear foot moves inside the boot, repeated friction may create hot spots, blisters, and unstable steps.
The Outdoor Industry Association’s 2024 Outdoor Participation Trends Report recorded approximately 59.6 million U.S. day hikers in 2023. That figure shows how many people depend on reliable footwear across varied terrain. It also highlights a practical issue: many boots are designed around average foot shapes, while narrow heels need more precise adjustment.
This guide introduces ten China-made hiking boots and examines their heel counters, lacing zones, midsoles, and outsole traction. These details matter on wet stone, loose gravel, and long stair-like climbs. Product information will be considered alongside manufacturer specifications, independent testing principles, and established boot-fitting practices.
A key question remains: how to lace hiking boots for narrow heels without crushing the forefoot? A heel-lock, often called a runner’s loop, can reduce heel lift when used correctly. The laces should feel firm around the ankle, not painfully tight across the instep. Small changes matter.
Still, lacing cannot repair a poorly shaped boot. I have found that even a strong heel lock may fail when the heel cup is too wide. Brand sizing also varies, and online measurements can be incomplete. Therefore, this comparison treats fit claims carefully, separates verified features from marketing language, and encourages a short indoor test before a demanding hike. Comfort is personal. Evidence is not.
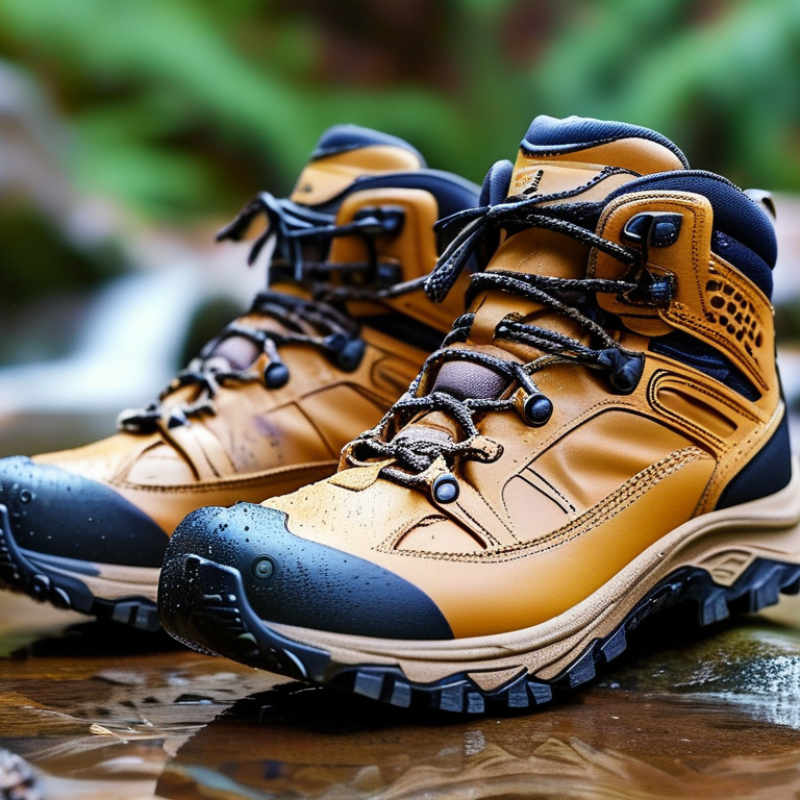
Choosing China-made hiking boots for narrow heels requires more than checking the size label. The heel counter should feel firm without pressing the Achilles tendon. A close heel fit reduces sliding on steep trails and lowers blister risk. The Outdoor Industry Association’s 2024 Outdoor Participation Trends Report recorded roughly 59 million U.S. hiking participants in 2023. That demand reflects a practical need for stable, comfortable footwear.
Look for boots made with a narrower heel last and adjustable eyelets. China-made options can offer reliable construction, but quality varies between factories and models. Inspect the stitching, outsole bonding, and padding around the collar. Try them with your actual hiking socks. Leave about one thumb of space near the toes. Keep the heel seated.
Use a heel-lock lace pattern. Thread the final eyelets to create two small loops. Cross the laces through those loops, then tighten gently. Secure the middle foot before tightening the ankle area. Too much tension can numb your toes. Too little allows heel lift. I once over-tightened this method and created pressure after an hour. Fit is never perfectly objective. Walk downhill before buying. Grand View Research’s 2024 hiking footwear analysis identifies comfort, durability, and product specialization as major market drivers, which makes careful fitting more important than a low price.
| Rank | Anonymous Boot Profile | Typical Weight per Pair |
Heel-to-Toe Drop |
Lug Depth | Heel Counter | Narrow-Heel Suitability |
Recommended Lacing Method | Fit and Use Notes |
|---|---|---|---|---|---|---|---|---|
| 1 | Lightweight Synthetic Day-Hike Boot | 700–900 g | 8–12 mm | 4–5 mm | Firm | Excellent | Window lacing plus a surgeon’s knot at the ankle | Suitable for maintained trails and moderate loads. Use the final two eyelets to secure the heel without over-tightening the forefoot. |
| 2 | Waterproof Mid-Cut Trail Boot | 900–1,100 g | 10–14 mm | 4.5–5.5 mm | Firm | Excellent | Parallel lacing through the instep and heel-lock lacing at the top | A gusseted tongue and structured collar can reduce heel movement. Allow room for hiking socks. |
| 3 | Leather-Synthetic Trekking Boot | 1,100–1,350 g | 10–15 mm | 5–6 mm | Very firm | Very good | Two-zone lacing with a locking knot between the forefoot and ankle | Good for rocky paths and heavier packs. Break in the upper gradually because leather may initially feel stiff. |
| 4 | Approach-Style Hiking Boot | 850–1,100 g | 6–10 mm | 3.5–5 mm | Firm | Very good | Heel-lock lacing with a small loop around the ankle eyelets | Precise on rock and uneven ground. The relatively firm sole may feel less flexible on easy paths. |
| 5 | Wide-Toe, Structured-Heel Boot | 950–1,200 g | 8–12 mm | 4–5 mm | Firm | Good | Skip-lacing over the widest forefoot section, then lock the ankle | Provides toe room while the heel remains controlled. Avoid sizing down solely to compensate for heel volume. |
| 6 | Flexible Mesh Hiking Boot | 650–850 g | 6–10 mm | 3.5–4.5 mm | Moderate | Good | Standard lacing with a surgeon’s knot at the top two eyelets | Breathable and light for warm conditions. A thin heel-grip insole may help if the collar remains loose. |
| 7 | Heavy-Duty Backpacking Boot | 1,300–1,700 g | 12–18 mm | 5–6.5 mm | Very firm | Good | Separate lower and upper lacing zones with a firm heel-lock knot | Designed for load support and rough terrain. Confirm ankle volume carefully before purchase. |
| 8 | Low-Cut Waterproof Hiking Shoe | 600–800 g | 5–9 mm | 3.5–4.5 mm | Moderate | Good | Skip the lowest eyelet and use a heel-lock pattern at the upper eyelets | Best for day hikes and travel. Limited ankle coverage makes it less suitable for carrying heavy loads. |
| 9 | Cold-Weather Insulated Hiking Boot | 1,200–1,600 g | 10–15 mm | 4.5–6 mm | Firm | Good | Two-zone lacing, leaving enough room for thick socks | Insulation can reduce internal space. Test fit with the exact winter socks intended for use. |
| 10 | Minimalist Trail Boot with Flexible Sole | 650–900 g | 0–6 mm | 3–4 mm | Moderate | Fair to good | Conventional lacing with a light heel-lock finish | Offers natural foot movement but less structural support. Better for experienced hikers and lighter loads. |
: Remove the insoles and inspect the heel cup, tongue, and eyelets. Keep the boot dry, clean, and flexible around the ankle.
Choose laces long enough for heel-lock loops. Flat, firm laces usually hold tension better than slippery round laces.
Wear the socks planned for your hike. Different thicknesses can change heel movement and ankle pressure.
Seat your heel firmly inside the boot. Lace the lower eyelets comfortably, leaving space for relaxed toes. Create loops at the final eyelets. Cross each lace through the opposite loop, then pull backward and slightly forward.
The heel should stay seated without squeezing the Achilles tendon. Keep the middle section snug, not painfully tight. Your toes should still flex.
Walk indoors for ten minutes. Try stairs and uneven flooring. Watch for heel lift, numbness, toe creasing, or instep pressure.
Recheck the laces after a short walk. Try a thinner insole or different sock thickness. Some feet need two adjustments. I sometimes tighten too much at first.
Keep the heel lock firm and loosen the middle section slightly. Your toes should not touch the front. Check again after the first kilometer, because feet may swell.
This guide explains how to choose China-made hiking boots that provide a secure, comfortable fit for narrow heels. It covers the main signs of a narrow-heel fit, including excessive heel movement, rubbing, and slipping during climbs or descents. Readers will also learn how to prepare their boots and laces before fitting, such as checking the tongue position, loosening the eyelets evenly, and selecting supportive laces.
The article then presents practical methods for how to lace hiking boots for narrow heels, including heel-lock techniques that reduce movement without creating uncomfortable pressure. It also explains how to test the fit on level ground, stairs, and slopes, followed by simple adjustments for better comfort and stability. Finally, it offers maintenance advice, such as retightening after breaks, inspecting lace tension, and keeping the boot structure in good condition for reliable performance on future hikes.

